How To Embed A Picture In An Email: Step-by-Step Guide
In our digital age, communicating through emails can sometimes feel like sending a message in a bottle—there’s no guarantee it will stand out when you toss it into a vast ocean of inboxes. So, how do you make sure your messages don’t get lost in the waves? One effective email marketing strategy is embedding images directly into your emails. Not only do these visuals grab attention, but they also help convey your message more clearly.
Imagine receiving an email that feels vibrant and engaging instead of one filled with dry text. In this guide, we’ll walk you through the steps on how to effortlessly embed pictures in your emails, making your communications not just informative but captivating. Let’s dive in!
To embed a picture in an email, position your cursor where you’d like the image to appear, then select the ‘Insert’ option and choose ‘Pictures’ to upload from your device. This will integrate the image directly into the email body, enhancing visual appeal and engagement for your recipients.
Embedding a Picture Directly Into an Email
One of the most straightforward methods to embed a picture is by using the “Insert” function, a feature found in most popular email clients such as Outlook, Gmail, and Apple Mail. This approach not only allows you to integrate visual content seamlessly but also creates a more engaging experience for the recipient. Imagine receiving an email that feels alive with imagery rather than one filled with disjointed attachments; that’s the beauty of embedding images directly!
To get started, place your cursor precisely where you envision the image appearing within the body of your email. This simple act sets the stage for the next step: navigating to the ‘Insert’ tab. Here, you’ll typically encounter options like ‘Picture’ or ‘Image.’ Selecting this will prompt your file explorer to open, allowing you to choose the perfect picture to complement your message.
As you browse through your files, it’s essential to select an image that not only fits aesthetically but is also optimized for web use. Images should be around 72 DPI(Dots Per Inch) for clear visibility while ensuring they load quickly without overwhelming email size limits. Once you’ve chosen your image, simply click ‘Open’ or ‘Insert’ to embed it into your email. Voila! Your picture is now part of your message.
Data shows significant advantages to this practice; according to a study by HubSpot, emails featuring images achieve a remarkable 42% higher click-through rate compared to those sans visuals. So, incorporating images is not merely about aesthetics—it’s about increasing engagement and effectiveness in communication.
However, variations exist across different email clients that may offer alternative methods, enhancing efficiency while maintaining that visually appealing touch.
For instance, in Gmail, you can utilize the “Insert photo” icon at the bottom of your compose window to either upload directly from your device or input a web address. Instead of navigating multiple tabs, this option gives immediate control over how the image is embedded. Similarly, Apple Mail users have the convenience of dragging and dropping images directly into their emails—making it feel more intuitive and natural.
Remember that sharing images isn’t just about insertion; considering how they are viewed on multiple devices matters too. Always test how your embedded images appear on both desktop and mobile interfaces before hitting send. This way, you ensure every recipient receives an email that not only communicates but captivates.
With these insights on embedding images effectively under your belt, it’s time to explore another practical method that streamlines this process even further.
Using Drag and Drop in Email Clients
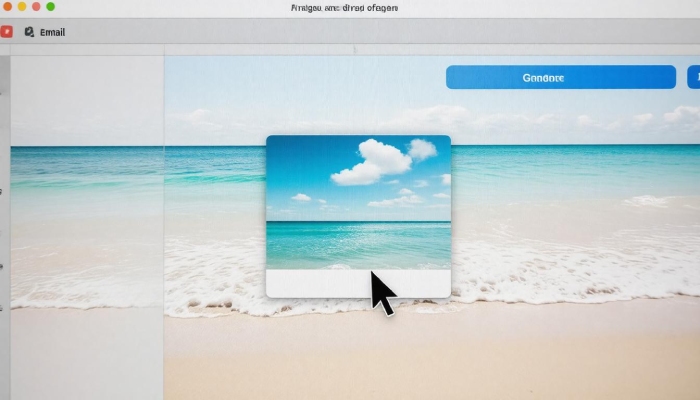
The drag-and-drop function has completely transformed how we embed images in our emails. This method is remarkably user-friendly, eliminating complicated steps while allowing for smooth image integration directly into your email message. Imagine sitting at your desk, ready to send an important update, and instead of fumbling through menus and options, you’re simply grabbing your photos and placing them where they belong within the email body. It’s as straightforward as putting a book on a shelf.
Popular email clients such as Gmail, Outlook, and Apple Mail support this functionality extensively. To start, open your file explorer on your computer. Locate the image you wish to embed—be it a charming photograph or an eye-catching graphic. Once you’ve found it, click on the file and hold down the mouse button. Then, just drag it over to the open email draft and release. Voilà! Your image is now embedded right where you want it!
A crucial tip: always ensure that your image size is manageable; large files can slow down not only the upload process but also overall email performance, potentially affecting deliverability.
Moreover, if you’re working with multiple images, drag and drop becomes an efficient solution. You can quickly embed several images in one go, adjusting their positions by simply dragging them around the email window. This flexibility allows you to create visually appealing layouts effortlessly.
Keep in mind that taking advantage of drag-and-drop requires compatible software versions. Familiarizing yourself with your specific email client’s capabilities will enhance your overall experience. Not all formats may render perfectly across different platforms, so make sure to double-check how your email looks before hitting ‘send.’
With such ease of use afforded by drag-and-drop embedding, there’s no reason to hesitate when it comes to enriching your communications with visuals. Now, let’s look into how to seamlessly integrate pictures using distinct features tailored for another popular platform.
Embedding Pictures in Gmail

To begin embedding images effectively, the first step is to compose a new email. Clicking on the “Compose” button opens a fresh canvas where your words and images will come together. It’s like setting the stage for a play – you want everything to be just right before you introduce your characters, or in this case, your visuals.
Once the compose window is open, look for the ‘Insert Photo’ icon, which resembles a small mountain landscape. This little icon is your gateway to adding that perfect image, ensuring that your email is visually appealing. By clicking it, you’re inviting an array of options to enhance your message.
When considering where to source your images, there are several possibilities. You can upload from local storage, grab images from Google Photos or Albums, or even paste a web URL directly.
If you opt for ‘Upload’, choose files that are easily accessible on your computer. It’s advisable to optimize your image size beforehand; larger files not only slow down loading times but may get flagged as too big by some email platforms. A general rule of thumb is to keep your images under 2MB for seamless delivery.
After selecting and uploading an image, it will manifest itself right within the body of your email. Here’s where you can let your creativity shine by resizing the image as necessary. By dragging the corners of the image, you can make adjustments until it harmonizes perfectly with your text layout.
Important Considerations
However, it’s crucial to remember that embedded images might render differently across various devices and email clients. What looks fantastic on your screen may appear oddly configured on someone else’s phone or tablet. Testing how emails render on different platforms can save embarrassment down the line—after all, we don’t want our beautiful images appearing distorted or missing altogether.
Additionally, providing descriptive alt text for each image is not merely nice; it enhances accessibility for recipients using assistive technologies. Adding descriptive text ensures everyone understands what the image conveys, bridging gaps in communication.
Finally, always keep in mind that while embedding images adds flair to your emails, moderation is key. Too many visuals can clutter your message and distract from its central purpose. Just like seasoning in food, the right balance can elevate a meal—or an email—to new heights.
Now that you have these important techniques at your disposal for embedding pictures in emails, let’s shift our focus to another popular email platform and explore its specific methods for enhancing visuals in your messages.
Embedding Pictures in Outlook

Embedding pictures in Outlook is a straightforward task that provides various methods to ensure your emails are visually appealing and informative. Whether you’re sending a quick update or crafting a marketing message, this process can enhance communication. For instance, if you’re attaching an image for a presentation, utilizing the right technique will significantly impact how your recipient perceives your message.
Outlook Methods
In the classic Outlook version, the steps are intuitive. First, you begin by opening a new subject email message; simply click on ‘New Email.’ Once you’re in the composition window, navigate over to the ‘Insert’ tab—this is where the magic happens. By selecting ‘Pictures,’ you’ll be prompted to browse through your files.
This is particularly useful when you have specific images saved locally that you want to include. The key here is ensuring that the selected image aligns well with the content of your email, adding value rather than distraction.
Alternatively, if you’re using the new Outlook interface, you’ll discover even more flexible options at your disposal. One notable feature is the drag-and-drop capability. This means that if you have an image ready on your desktop, all you need to do is click and drag it into the body of your email. This method not only saves time but also integrates visually into your text seamlessly.
Continuing with the new interface, another noteworthy method involves linking images stored on OneDrive. If you want to include a picture without embedding it directly into the email, uploading it to OneDrive allows you to insert it as a link.
This approach is particularly beneficial for collaborating with teams since it enables real-time editing and keeps recipients updated with the latest version of the document or presentation—something that’s incredibly useful during ongoing projects.
User feedback emphasizes that while linking may sacrifice some immediate visibility in terms of embedding visuals directly, it enhances collaboration and ensures everyone has access to current materials without needing multiple attachments.
Understanding these methods opens up opportunities for more effective communication through visual content. By choosing whether to attach images directly or use links based on context, you can tailor your approach for maximum impact.
With these embedding techniques under your belt, it’s time to explore how to leverage HTML for even greater flexibility and control over image presentation in your emails.
Using HTML for Image Embedding

For those who have a basic understanding of coding, using HTML to embed images in your emails can be incredibly beneficial. With just a few lines of code, you can ensure your visuals are displayed and formatted exactly as you desire. By utilizing the <img> tag, you can insert an image directly into your email body, creating a seamless experience for your recipients.
The first step is preparing the HTML code by crafting your <img> element correctly. It typically looks like this:
<img src=”https://yourdomain.com/image.jpg” alt=”Image Description”>
Here, the src attribute specifies the URL of the image you’d like to display, while the alt attribute provides alternative text if the image fails to load. This is not just a technical requirement; it ensures accessibility by providing descriptive information about the image to visually impaired readers and enhances Search engine optimization(SEO).
Now that we’ve prepared our code, it’s time to embed it into your email.
The next step involves embedding the code in your email correctly. Open your preferred email client and switch to HTML or source code view, which is often found in the settings or options menu on most platforms. Paste your HTML code where you want the image to appear in the body of your email.
If you’re unsure about switching views, many modern email clients offer a quick toggle between plain text and HTML modes. Keep in mind that some styling and formatting may need adjustment based on how different clients render your message.
After embedding the code, there’s one crucial step before sending it out widely.
Always remember to send a test email to yourself first! This step cannot be overstated: testing ensures that everything looks correct from the recipient’s end. Sometimes images may not load due to disparities in how different email clients interpret HTML. By checking for proper loading and display firsthand, you can catch any potential issues early on.
While using HTML offers significant customization advantages—like controlling size and alignment—some email clients might block embedded images by default for security reasons. However, most contemporary clients support basic HTML well. It’s important then to consider alternatives such as hosting images externally for more reliability. Additionally, ensure that your images are optimized for various devices because mobile users represent a large portion of today’s email readership.
Harnessing HTML for image embedding not only elevates your visual communication but also highlights potential technical considerations. Now, let’s explore strategies that will help you optimize those embedded visuals for maximum effect.
Best Practices for Email Images

The effectiveness of an email often hinges not only on the words you choose but also on how you present supporting images.
Properly integrating images can significantly elevate your message, creating a lasting impression. This is where optimizing image size comes into play. Keeping your images under 1MB is essential; larger files can weigh down your loading times, leading to frustrated recipients who may abandon your email before it finishes rendering. Additionally, optimizing images ensures they look sharp without compromising quality, allowing your message to shine.
Incorporating alt text is another critical element in this process. Alt text serves as a brief descriptive note for each image, serving multiple purposes: it improves accessibility for screen readers used by visually impaired users and provides context in case images fail to load.
Imagine sending a beautifully designed email that captures attention instantly, only for half of it to be missing due to technical glitches. Alt text helps ensure that your core message isn’t lost, no matter the circumstances.
Visual consistency matters as well; maintaining a consistent style throughout your email isn’t merely about aesthetics but professionalism. When sending an email with images in varying qualities or styles—especially when using tools like Nureply—it can create a disjointed reading experience, detracting from your credibility. A professional look cultivates trust and encourages engagement with your audience.
To take things a step further, testing becomes paramount. Always test how images render on different devices and email clients. With numerous recipients accessing emails through various platforms—from desktop applications to mobile devices—ensuring compatibility is crucial. Don’t rely solely on what looks good in your own inbox; involve family and friends when organizing testing sessions to gain fresh perspectives—what appears flawless on one device may become misaligned on another.

If you’re unsure where to start with optimizing images before embedding them in emails, consider leveraging image compression tools like TinyPNG. These tools allow you to reduce file sizes without sacrificing visual quality, ensuring a smoother experience for everyone involved.
Putting all these tips into practice will greatly enhance the way recipients perceive and interact with your emails. By following best practices regarding image embedding from start to finish, you’ll not only present eye-catching visuals but also maintain clarity and professionalism throughout.
These strategies collectively contribute to more effective communication through email while ensuring an accessible and enjoyable experience for all recipients.


