
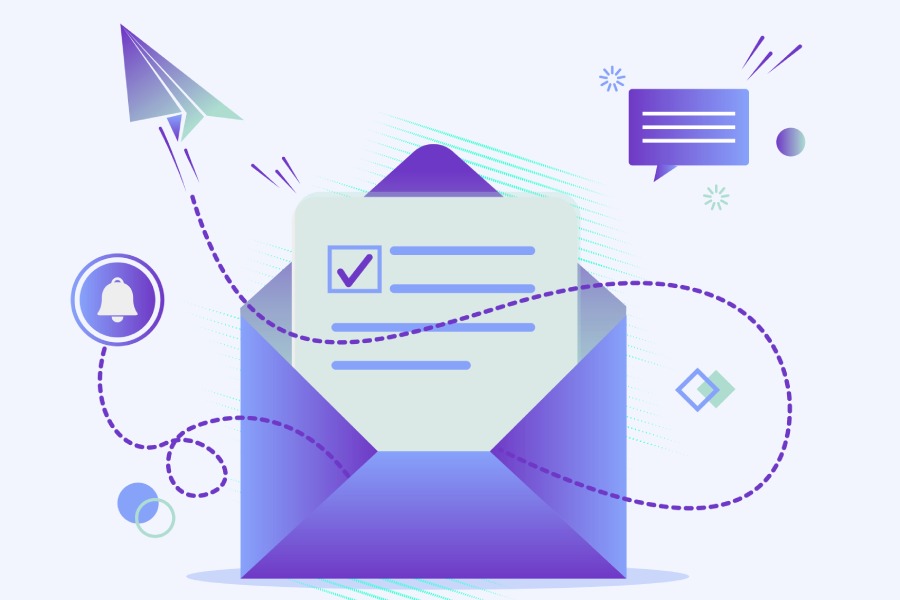
How To Create An Unsubscribe Link: A Step-by-Step Guide For Email Marketing
In the world of email marketing, keeping your audience engaged while respecting their preferences can be quite a juggling act. You’ve probably encountered those moments when you felt overwhelmed with emails and just wanted a quick escape route—hitting that unsubscribe button seemed like the perfect solution at the time. Now, imagine being on the other side, crafting emails for your audience; it’s your job to make sure they can easily opt-out if they choose to.
Creating an unsubscribe link might feel tedious, but it’s essential for maintaining trust and complying with regulations like the CAN-SPAM Act. In this guide, we’ll break down the steps to help you easily design a seamless unsubscribing experience for your readers—while keeping communication open and friendly.
To create an unsubscribe link, you can use merge tags specific to your email platform, such as {{unsubscribe}} in block editors or Unsubscribe in HTML emails. Ensure that the link is easily visible and straightforward to enhance user experience and compliance with legal requirements like the CAN-SPAM Act.
Easy Steps to Create an Unsubscribe Link
The first step in this process is to select your method for creating the unsubscribe link. You can leverage an email marketing platform, which often provides user-friendly tools for this purpose, or opt for a manual approach if you’re comfortable with some coding.
Platforms like Mailchimp or Constant Contact simplify the process by automatically generating unsubscribe links that comply with legal requirements. If you go the manual route, just remember that you’ll handle more details but gain greater control over how it looks and functions in your emails.
With your method chosen, it’s time to gather the necessary tools you’ll need to create a functional unsubscribe link.
Having access to your chosen email marketing platform is crucial as it provides the interface needed to create and manage your unsubscribe link. If you’re opting for a manual approach, a simple text editor will suffice for coding the link yourself. It may also help to have a URL shortener on hand; if your unsubscribe link is long and cumbersome, shortening it can make it cleaner and easier for your subscribers to use without breaking any formatting when they read your email.
Once you’ve collected all your tools and resources, it’s time to generate the actual unsubscribe URL.
If you’re using an email marketing service, most platforms will offer an unsubscribe URL you can easily copy and paste into your email template. For those who are coding manually, consider creating a dedicated unsubscribe page on your website where you can direct users. This helps maintain consistency and branding across your communications while ensuring that subscribers know they’re being taken somewhere secure and legitimate.
Finally, let’s place this important link directly into your email.
It’s essential to craft clear and straightforward text for your unsubscribe link so recipients immediately understand its purpose when they see it. Try using language like “Unsubscribe from these emails” or “Manage your subscription preferences.” Positioning this link at the bottom of your emails is ideal because it ensures visibility without interfering with the main content of your message.
Following these simple steps creates an accessible unsubscribing option for your users while complying with regulations and reinforcing subscriber trust.
With a solid foundation now established, understanding how to leverage various platforms can further optimize your email marketing strategy.
Using Email Marketing Services
The beauty of utilizing an email marketing service lies in the way it streamlines tasks that would otherwise be tedious and time-consuming. These platforms, including MailChimp, Constant Contact, and Sendinblue, come equipped with built-in functionalities that make managing unsubscribe links straightforward and efficient. Instead of coding or hunting for the right steps, you can focus your energy on crafting engaging content for your audience.
For instance, when using MailChimp, everything is designed with user-friendliness in mind. You simply navigate to the Campaign Builder where adding elements is as intuitive as dragging and dropping. The process involves using the link tool where you enter |UNSUB| in the URL field. This generates a dynamic link that directs users effortlessly to your unsubscribe page. It’s about ensuring accuracy, which is crucial for compliance with regulations like CAN-SPAM.
Furthermore, other platforms follow suit in their approach, maintaining this focus on simplicity while offering unique features.
Constant Contact
If you’re using Constant Contact, the process is equally seamless. Start by dragging a text box element onto your email template. This feature gives you flexibility in placement—whether at the bottom or strategically within the content itself. After placing the text box, simply type “Unsubscribe” and use the link tool to connect it directly to your unsubscribe URL. This action guarantees that the option is visible and accessible, building trust with recipients and reducing the odds of being marked as spam.
Implementing these methods through such services saves time while leveraging their systematic design ensures your unsubscribe link is correctly integrated each time. As a marketer, you want to keep things efficient while ensuring compliance and enhancing user experience. Missing out on proper implementation could lead to headaches later when analyzing engagement metrics or addressing potential complaints about spam.
It’s vital to test those links before sending out any campaigns. This can save you from potential embarrassment and legal troubles down the line while keeping your audience engaged in a positive way.
Utilizing email marketing services not only simplifies the process but also allows you to step up your game professionally in the ever-evolving landscape of digital marketing strategies while respecting user preferences.
Now that we’ve covered using these services effectively, let’s explore how to incorporate an unsubscribe link manually into your emails.
Adding an Unsubscribe Link Manually
To start adding an unsubscribe link by hand, you’ll need to lay a solid foundation. The first step in this journey is all about creating an effective unsubscribe page. Think of this page as a safe harbor for your readers—when they decide to part ways with your email communications, you want them to feel acknowledged and respected. This page should clearly confirm their decision to unsubscribe and perhaps even show gratitude for the time they’ve spent engaging with your content.
Additionally, consider including options where they can specify why they are opting out or suggest ways you could improve. Gathering feedback at this stage can turn a potential loss into valuable insights.
This simple yet thoughtful touch serves not only to elevate user experience but can also reveal trends about what content resonates or, conversely, repels your audience.
Once you’ve built your unsubscribe page, it’s crucial that the next step involves generating the actual link that will lead users to this new destination.
Step 2 – Generate the Link
Creating the unsubscribe link doesn’t need to be complicated. Your goal here is clarity and functionality. If the URL to your unsubscribe page is lengthy or unwieldy, using a URL shortener can make it cleaner and more user-friendly.
When drafting your email template, embed that shortened URL within an inviting call-to-action text like “Click here to unsubscribe.” Using straightforward language not only makes it easy for recipients but also boosts compliance with regulations, as they can easily identify the purpose of the link without fumbling through complicated terminology.
Bear in mind; it’s essential that the link is easy to find. Statistics reveal that around 70% of users prefer the unsubscribe link positioned at the bottom of an email. So, placement and visibility are key to maximizing effectiveness.
While some marketers believe that taking control of the process provides greater flexibility over how users interact with their emails, there’s a trade-off involved. Manually inserting an unsubscribe link—especially when not using a platform like Nureply—adds layers of complexity that can lead to errors, like broken links or improper formatting, that diminish user trust.
In many cases, relying on established email marketing services may offer a more streamlined approach, ensuring that you’ll likely encounter fewer complications down the line and secure compliance with legal requirements.
By implementing these steps methodically, you’re laying the groundwork for a seamless transition in your communication practices. Next, we explore effective methods tailored for coding this essential element into your email setup.
Coding the Unsubscribe Link in HTML

Adding an unsubscribe link using HTML offers a streamlined, customizable approach. This method grants you complete control over how the link looks and where it directs your subscribers. The best part? It’s easier than it sounds! To get started, you’ll need to understand the basics of HTML anchor tags, which are used to create hyperlinks.
Step-by-Step HTML Guide
First things first, to create an unsubscribe link, you will start by writing what’s known as an anchor tag. This is essential because it tells the browser that you want to create a clickable link. Here’s what you need to do: Insert the following line of code into your email’s HTML:
<a href=”http://yourunsubscribepage.com”>Unsubscribe</a>
But remember to replace “http://yourunsubscribepage.com” with your actual unsubscribe URL. If you’re using a platform like MailChimp or similar services, they often generate this unique URL for you and format the link automatically; just plug it in!
Once you’ve added this code, the next critical step is ensuring everything functions as intended.
Step 2 – Test Your Link
To avoid any headaches later, always send a test email to yourself after adding the unsubscribe link. Click on that newly minted link; it should lead you directly to your designated unsubscribe page. This not only helps verify that the link is accurately formatted but also allows you to gain insight into what your subscribers will experience when they choose to opt-out.
This manual method does require a bit more diligence, but it provides a tailored experience for the user. A well-functioning link affirms trust and respect for your audience’s freedom of choice—an aspect that goes a long way in maintaining a positive relationship with your subscribers.
Include an Unsubscribe Message
It’s also beneficial to consider including an informal or friendly message next to your unsubscribe link to soften the blow of leaving. For instance, messages like “We’ll miss you! 😢” or “You can always come back!” can remind users of their value and help reduce any potential negative feelings associated with opting out.
With these steps outlined, coding an unsubscribe link in HTML becomes easy and enhances user experience while fulfilling legal requirements necessary for email marketing practices.
Moving forward, it’s essential to ensure that these links are not only present but also strategically positioned within your emails for maximum impact.
Placement and Visibility Tips
Utilizing the right position for your unsubscribe link is crucial for optimizing user behavior. Most users expect to find the unsubscribe option in the footer, as about 70% naturally look for it at the bottom of an email. However, merely placing it there is not sufficient. You must ensure that it stands out among other text to catch the eye effectively. For instance, consider using a slightly different font color or size to distinguish it from generic text. By making it visually unique, you enhance its visibility and considerability.
Additionally, don’t bury it under dense paragraphs. If the unsubscribe link feels like a needle in a haystack, users might abandon all hope and resort to marking your email as spam instead. This approach will undoubtedly hurt your sender reputation and could hinder future email campaigns. It’s a vicious cycle where poor link visibility leads to spam complaints, which in turn lowers engagement rates—a scenario every marketer should strive to avoid.
When an unsubscribe link is easy to locate, it shows recipients that you respect their choice and preferences, ultimately boosting trust in your brand.
One effective strategy is to include the unsubscribe link near key content areas such as the main call-to-action (CTA) of your email, even if it’s placed at the bottom. Doing so reminds users upfront that they have control over their subscription without detracting from primary goals like encouraging conversions or engagement.
Furthermore, always remember that clarity is essential. Using straightforward language such as “Unsubscribe” helps prevent confusion about what action users are taking when interacting with the link. Rather than simply hiding behind vague terms like “Manage Preferences,” a direct approach fosters transparency and reinforces user confidence in continuing their interaction with your content.
As you implement these strategies for visibility and placement, you’ll pave the way for improving user experience while simultaneously enhancing engagement rates. This groundwork leads seamlessly into how you’ll handle your subscriber list moving forward.
Managing Your Unsubscribe List
Regularly managing and updating your unsubscribe list is essential for keeping your email marketing efforts strong and compliant. Overlooking unsubscribe requests risks compliance issues and damages the trust of those who engage with your brand. A well-maintained list leads to better open rates, higher click-through rates, and ultimately, better returns on investment.
Beginning with regular updates ensures that your email list remains relevant and robust.
Regular Updates
It’s vital to ensure that your system processes unsubscribe requests immediately. Incorporate automation tools that remove users from your mailing list as soon as they opt out. Conducting periodic audits helps catch any individuals who might have missed the unsubscribe process. By removing these names, you keep your list clean and focus on recipients who genuinely want to hear from you.
A well-maintained list is like a well-tended garden; the more care you put into it, the more fruitful it becomes.
Compliance With Regulations
Compliance with regulations such as the CAN-SPAM Act is critical in managing your unsubscribe list. The law stipulates that you must honor unsubscribe requests promptly; failing to do so can lead to severe fines and damage your brand’s reputation. Maintaining compliance demonstrates a commitment to ethical marketing practices that build trust among subscribers.
| Step | Action |
| Regular Auditing | Check your list weekly to remove unsubscribed users |
| Immediate Processing | Use automation to process opt-outs instantly |
| User Verification | Send a follow-up email confirming the unsubscribe action |
As seen in the table above, clear protocols can streamline your unsubscribe management process. This not only ensures you’re operating within legal boundaries but also reinforces that you value each subscriber’s preferences.
Don’t overlook the chance to gather insights from users who opt out.
Gathering Insights
Consider implementing feedback forms upon unsubscription to understand why users are leaving. This information can guide future cold email campaigns, allowing marketers to adapt strategies based on direct input from former subscribers. Understanding user behavior enhances overall communication strategies and helps retain those who might otherwise consider opting out due to irrelevant content or excessive frequency—both of which can impact email deliverability.
Engaging with ex-subscribers in this way provides opportunities for improvement and fosters a greater understanding of what resonates with your audience. Managing your unsubscribe list effectively goes beyond mere compliance; it represents an opportunity for growth, engagement, and improved email deliverability between you and your audience.