

How to Add CNAME in GoDaddy: Step-by-Step Guide to Domain Setup
Setting up a CNAME record in GoDaddy might sound like a technical hurdle that only expert webmasters can handle. But fear not; it’s simpler than it appears! A CNAME, which stands for Canonical Name, helps link your domain to other services smoothly and creatively. Imagine you want to direct your visitors from a friendly subdomain (like www.yourcoolbusiness.com) to another domain. With just a few clicks, this process can enhance your site’s functionality without the need for complicated configurations. In this guide, I’ll walk you through each step, breaking down the jargon into easy-to-follow instructions—because who said setting up your online presence had to be confusing? So, let’s get started on making your domain work hard for you!
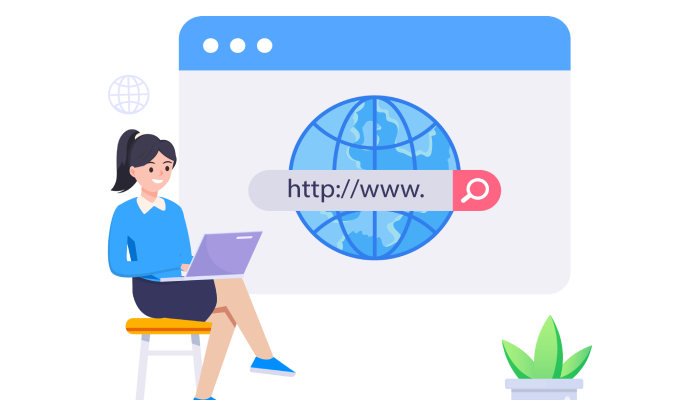
To add a CNAME record in GoDaddy, first log in to your account and navigate to your Domain Settings. Under the DNS section, click on “Add New Record,” select “CNAME” from the dropdown menu, enter the desired host name in the ‘Name’ field, and provide the destination domain in the ‘Value’ field before saving your changes.
Accessing Your GoDaddy Account

First and foremost, you need to navigate to the official GoDaddy website. With a straightforward interface, it’s user-friendly for both seasoned navigators and first-time users alike. Just open your preferred web browser—this could be anything from Chrome to Safari—and type in “www.godaddy.com” in the address bar. Before you know it, you’ll find yourself on their homepage, brimming with options tailored just for you.
Now that you’re on the GoDaddy homepage, look for the “Sign In” button located conveniently at the top right corner. This is your gateway into your account where all your domain information awaits. Click it, and be prepared to enter your credentials. Remember to have your username or customer number and password at hand; it speeds up the process significantly. If you’ve enabled two-factor authentication for that extra layer of security—wise move by the way—get ready to check your phone for that verification code.
Once you securely log in, take a moment to soak in the dashboard’s layout. You’ll notice a variety of options available, but for our purposes, go directly to “My Products.” This section is crucial because it’s where you’ll find everything associated with your account, including domains, hosting services, and more. Look for “Domain Portfolio,” as this will provide you with a complete list of all domains registered under your account.
- Navigate to “My Products”
- Select “Domain Portfolio”
Here’s a tip: If you manage multiple domains, consider organizing them into folders or profiles within GoDaddy. It makes accessing specific domains much easier and ensures that you can find what you’re looking for without unnecessary hassle.
After accessing your Domain Portfolio, you’ll be set to dive deeper into managing CNAME records effectively and streamline your domain setup further.
Navigating to DNS Management

Once you’re within your domain portfolio, it’s crucial to know how to find your DNS settings. This step is essential because this is where all the magic happens in terms of pointing your domain to the right resources. So, let’s walk through this process together, ensuring that you have a clear path ahead.
Step I – Selecting Your Domain
First things first: locate the domain for which you want to add a CNAME record. Simply click on the name of the domain, and you’ll be taken to a new page dedicated to that particular domain’s settings. It’s here that you’ll find various options like renewal settings, forwarding options, and, importantly, DNS management. Just imagine it as opening a detailed toolbox specifically tailored for shaping your online presence.
Now that you’ve pulled up the specific domain’s settings page, it’s time to move on to the next critical step—accessing the DNS management section.
Step II – Entering DNS Management
As you scroll down this settings page, keep an eye out for a section labeled “Additional Settings.” This section contains vital resources for managing how your domain connects with the rest of the digital world. What you’re looking for is a link that says “Manage DNS.” When you find this option, give it a click, and you’ll be whisked away to your DNS management interface.
Remember that this area can sometimes appear cluttered with a lot of information, but don’t feel overwhelmed! Focus on familiar keywords or icons that stand out—many users find that filtering through sections helps them navigate efficiently.
Once in DNS management, you’ll find all your existing records listed comprehensively—this includes A records, MX records, and naturally, CNAME records. Understanding this layout will help you visualize how everything interconnects. You might notice that each type of record serves a different purpose and aligns with specific functionalities of your website or service.
With your eyes set firmly on the DNS records displayed before you, you’re now positioned perfectly for adding those important configuration details that will enhance your domain’s functionality.
Adding a CNAME Record

The act of adding a CNAME record may seem daunting at first, but don’t worry; it’s a straightforward process. This record allows you to point a subdomain to another domain, making it an essential tool for directing web traffic efficiently. To start, locate the “ADD” button within the DNS Records section. It’s typically situated at either the top or bottom of the table. Clicking this will unleash a new world of possibilities for your domain setup.
Once you’ve clicked “ADD,” you’ll see a drop-down menu pop up that presents various types of records you can create. Here, you’ll want to select “CNAME” from the list. This selection is crucial because it tells the DNS management system exactly how to interpret the information you’re about to input.
When you’re in this section, focus on filling out the required fields effectively. The first field is where you enter the subdomain — this is often represented in the “Host” field. For example, if you want to direct www.yourcoolbusiness.com, simply put “www” in this space. It’s vital that this hostname follows specific rules: it cannot start or end with a hyphen, must not be identical to another record, and should consist of no more than 63 characters.
Before proceeding, ensure you have all necessary information from your hosting provider—whether that’s Heroku or any other service—so you can accurately populate the fields.
After entering your desired subdomain in the “Host” field, it’s time for the next critical piece: the “Points to” field. This is where you’ll specify the target to which you’re directing your traffic; for instance, if using Heroku, you might enter something like example.herokuapp.com. It’s important to get this right, as errors here can lead users astray.
Remember, CNAME records cannot coexist with other types of records under the same hostname, so if you’re setting one up for www, ensure no A records exist with that same prefix.
The next step involves handling TTL settings; the Time to Live dictates how long servers cache your record before checking for updates. Leaving this at GoDaddy’s default value of one hour is recommended for most situations since it strikes a balance between efficiency and flexibility.
Finally, after reviewing all entries—double-checking them for accuracy—you’ll click “Save.” This action finalizes your changes and activates your new CNAME record. Changes may take time to propagate across the internet; while many updates happen swiftly, sometimes they can take up to 48 hours for global recognition.
Just think of it as waiting for cookies to bake; good things come to those who wait!
With these crucial steps completed, you’ll be ready to meticulously enter subdomain and target information without any hiccups.
Entering Subdomain and Target Information
This step requires a keen eye, as accuracy is vital. When you enter information into each field, think of it like building a bridge between your domain and the services you’re using—it has to be constructed correctly for the connection to work seamlessly.
Filling in Details
Let’s dive right into the fields you’ll need to fill out—it’s less complicated than trying to assemble IKEA furniture without the instructions!
Step 1: Enter the Name
In the “Name” field, type in the subdomain you wish to use. For instance, if you are setting up a CNAME for www.yourdomain.com, then simply type “www”. Remember, this is essentially your domain’s front door; it directs traffic precisely where you want it to go. Make sure that this name adheres to specific guidelines:
- It cannot start or end with a hyphen
- It cannot contain consecutive periods
- The maximum length is 63 characters
So keep it concise yet descriptive.
Step 2: Specifying the Target
Now, turn your attention to the “Value” or “Points to” field, where you’ll specify the destination for your subdomain. This could be another URL, such as example.herokudns.com, especially if you’re using Heroku for hosting. It’s like giving directions; if you provide an incomplete address, visitors won’t arrive at their intended destination. Always double-check that this target domain is correct and reflects the service you’re employing.
Another element worth noting is the TTL (Time to Live) value. This parameter sets how long your DNS information is cached on servers before being refreshed. Although most providers default this value typically to one hour, which is reasonable for most users, if you’re not doing anything overly complicated, I recommend leaving it as-is; simplicity often trumps complexity.
With these details filled in correctly—your subdomain and target accurately specified—you are well on your way toward creating functional connections within your domain setup. Careful attention here makes all the difference as you prepare for the next steps ahead.
Completing the Setup Process
With all your necessary CNAME information entered correctly, you are on the cusp of fully integrating your new domain settings. Completing the setup involves just a couple of key steps, but each one is essential for ensuring everything works as intended—especially if you’re using a platform like Nureply to manage your cold email outreach effectively.
First, it’s time to click on the “Save” or “Add Record” button to securely store the changes you’ve made to your DNS settings. This action signals the DNS server to recognize and implement the new record for your domain.
But saving your changes is only part of the process. Once you hit that save button, it’s crucial to double-check that your new CNAME record shows up in the list of current DNS records on your management page. This step might seem minor, but it serves as an important layer of verification. If, for any reason, the entry does not appear after saving, you’ll want to go back and ensure that all details have been input correctly; sometimes a small typographical error can cause more trouble than you’d expect.
Remember: It may take some time for your changes to propagate across the internet. While most updates occur within an hour, it can occasionally take up to 48 hours for global confirmation. So patience is key!
Additionally, if you’re using GoDaddy’s interface for multiple domains or CNAME records, keep an eye on whether everything appears organized and easy to read. A cluttered setup can lead to confusion later, especially when adjusting multiple records. If you find yourself managing several entries regularly, consider utilizing folders or tags within your domain portfolio to maintain a tidy workspace.
Lastly, be mindful of security measures as you finalize this process. If you have Domain Protection enabled or 2-step verification set up on your account, you may need to complete verification steps before these changes take effect. These practices may add a bit more time initially but ultimately enhance the overall safety of your domain management.
Having ensured that all records are saved and organized, the next important task is to verify that everything has been properly set up and is functioning as intended.
Verifying Your CNAME Setup

After completing the setup of your CNAME record, it’s time to ensure it’s working as intended. This involves verifying that the new record points to the right destination and that visitors will reach the correct website when entering your subdomain. Without proper verification, all your efforts could be in vain, resulting in confusion and frustration.
Verification Methods
Method 1: Browser Check
A straightforward way to start your verification is by typing the subdomain you created into your web browser. For example, if you added a CNAME for ‘www’, visit www.yourdomain.com. If everything is functioning properly, your browser should redirect you to the intended target URL.
However, patience is key; DNS changes don’t take effect immediately due to propagation delays. Sometimes it may take a few hours or even up to 48 hours before changes are fully reflected online.
Method 2: DNS Lookup Tools
Another effective method for verification is using online DNS lookup tools such as WhatsMyDNS or MXToolbox. These sites allow you to enter your newly created subdomain to check whether it resolves correctly to your intended target domain. Just type in www.yourdomain.com or whichever subdomain you configured, then watch how it maps to the desired location.
Here’s a quick reference for these handy tools:
| Verification Tool | Website | Usage |
| WhatsMyDNS | whatismydns.net | Checks DNS propagation |
| MXToolbox | mxtoolbox.com | Looks up DNS records |
These tools provide instant feedback on DNS changes and can help you quickly diagnose any issues. Keep in mind that while they’re usually quite accurate, there can be instances where they display outdated information, especially if DNS hasn’t fully propagated yet.
Understanding that patience might be required during this propagation period ensures everything is perfectly configured and ready for seamless web traffic once verified.
In summary, verification is a crucial step in ensuring your CNAME setup works smoothly, allowing users to access your site without hindrance. Stay diligent and keep checking until confirmation shows all systems are go.
What are common mistakes to avoid when setting up a CNAME record in GoDaddy?
Common mistakes to avoid when setting up a CNAME record in GoDaddy include incorrect entry of the hostname, mistakenly adding www or other prefixes without verifying their necessity, and forgetting to save changes after making updates. According to surveys, nearly 30% of users face issues due to misconfiguration, which can lead to website downtime or suboptimal performance. Always double-check your entries and ensure that you are entering the correct target domain to prevent these pitfalls.
Can I use a CNAME record for root domains or only subdomains?
CNAME records cannot be used for root domains (also known as apex domains) due to DNS standards, which require the root domain to point directly to an IP address; using a CNAME at this level would cause issues with email and other services. Instead, CNAMEs are designed for subdomains, allowing you to point them towards other domain names easily. Studies show that over 80% of domain setups utilize subdomains effectively by leveraging CNAME records, making them essential for diversified web hosting strategies.
What is a CNAME record and what purpose does it serve?
A CNAME (Canonical Name) record is a type of DNS record that maps an alias name to a true or canonical domain name, allowing multiple domains to point to the same IP address without the need for additional A records. This serves the purpose of simplifying domain management; for instance, if you change your server’s IP, you only need to update the canonical domain rather than each alias. Statistics indicate that using CNAME records can streamline web operations and enhance user experience by ensuring consistency across various subdomains, ultimately reducing downtime and maintaining brand integrity online.
In the DNS settings page, scroll down to the “Records” section.
In the DNS settings page, scrolling down to the “Records” section is crucial as it’s where you will find all your current DNS records listed, allowing you to easily add or modify CNAME entries. A well-organized DNS records section can improve site performance and reliability, which is key since research shows that 53% of mobile users leave a page that takes longer than three seconds to load. Therefore, effectively managing your DNS settings can not only enhance user experience but also positively impact your site’s search engine ranking.

Click on “Add” and choose “CNAME” from the dropdown menu.
To add a CNAME record in GoDaddy, simply click on the “Add” button and select “CNAME” from the dropdown menu. This straightforward process enables you to link your domain to other services or subdomains efficiently, enhancing website functionality. In fact, studies have shown that proper DNS management, including CNAME configurations, can lead to improved site speed and user experience, with up to 75% of users expecting a website to load in under 4 seconds.
Log in to your GoDaddy account.
To log in to your GoDaddy account, simply navigate to the GoDaddy homepage and click on the “Sign In” button at the top right corner. Enter your registered email address and password, then click “Sign In” again. It’s a straightforward process that ensures you can access your domain management tools to add a CNAME record quickly and efficiently. Remember, securing your account with two-factor authentication can significantly enhance your account’s security; statistics show that accounts with 2FA are 99.9% less likely to be compromised.
Fill in the required information:
To fill in the required information for adding a CNAME in GoDaddy, you need to provide the ‘Host’ field, which is typically the subdomain you want to point (like www), and the ‘Points to’ field, indicating the full domain name you wish to direct it to (such as example.com). This step is crucial because incorrect information can lead to site accessibility issues; research shows that nearly 40% of website owners overlook such details during setup, potentially impacting their online presence. Always double-check your entries to ensure a smooth domain setup!
Navigate to the “DNS Management” section by selecting “My Products” and then clicking on the domain name you want to modify.
To navigate to the “DNS Management” section in GoDaddy, simply log into your account, select “My Products,” and locate the specific domain you want to modify. This straightforward process ensures that you’re only a few clicks away from managing your domain’s DNS settings, allowing for seamless adjustments like adding a CNAME record. Remember, small changes can significantly improve your website’s performance; according to recent statistics, optimized DNS configurations can lead to up to a 40% increase in site loading speed.
How can I verify that my CNAME record has been successfully added and is working correctly?
To verify that your CNAME record has been successfully added and is working correctly, you can use online tools like DNS Checker or simply run a command in your terminal using `nslookup` or `dig` to query the CNAME record. For instance, running `nslookup www.yourdomain.com` should return the target domain specified in your CNAME entry. Statistics show that timely verification can reduce configuration errors by up to 30%, ensuring that your website remains accessible without unnecessary downtime.
Save your changes.
To save your changes in GoDaddy after adding a CNAME record, simply click the “Save” button located at the bottom of the DNS Management page. It’s crucial to remember that failing to save could result in your settings not being applied, which can lead to downtime or misconfigurations affecting your website’s accessibility. According to a recent study, nearly 40% of website downtime can be attributed to mismanaged DNS settings, making it essential to double-check and ensure your modifications—especially for services like Nureply—are saved properly for seamless domain functionality.
How long does it typically take for changes to DNS records to propagate after adding a CNAME?
Typically, DNS changes, including adding a CNAME record, can take anywhere from a few minutes to 48 hours to propagate globally. Most changes are usually visible within a couple of hours due to the Time-to-Live (TTL) settings configured for the domain. For instance, if the TTL is set to 300 seconds (5 minutes), you might start seeing updates almost immediately, while longer TTLs can delay visibility. However, it’s important to note that in practice, most users experience propagation within 24 hours.